Are you looking for inspiring living room kitchen combo ideas to perfect your open-plan space? The open-concept layout has become a cornerstone of modern living, celebrated for its airy, spacious feel and its ability to bring families and friends together.
However, this popular design also presents a unique challenge: how do you create a space that feels both cohesive and connected, yet has clearly defined, functional zones? The art of a successful open plan lies in mastering this delicate balance creating a seamless flow while ensuring your living area doesn’t feel like an extension of your kitchen’s work zone.
This guide will provide you with 15 smart ideas, from architectural solutions to clever furniture arrangements, that will help you define your zones, create a cohesive style, and turn your living room kitchen combo into a beautiful and highly functional great room.
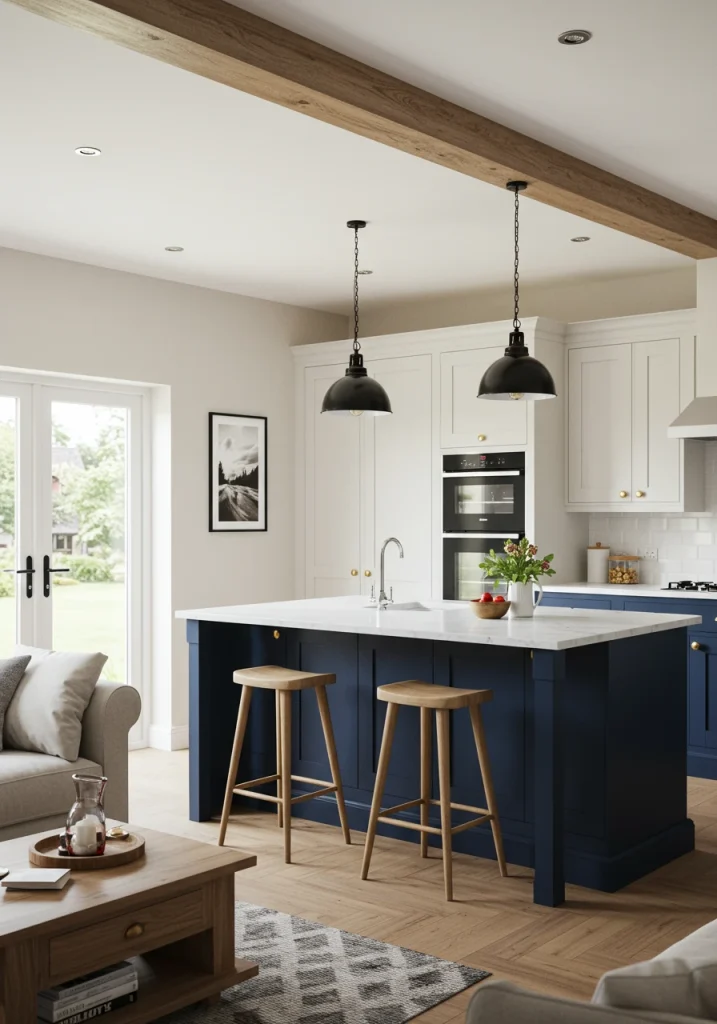
1. The Kitchen Island: Your Hardest Working Divider
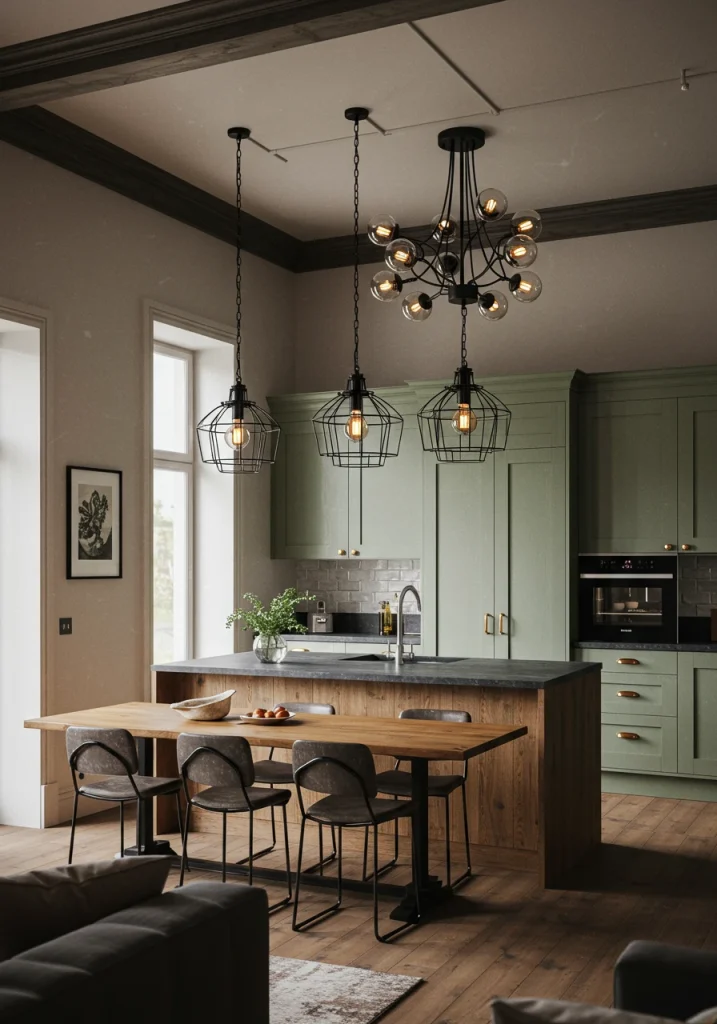
The kitchen island is the undisputed hero of the open-plan layout. It is the single most effective element for creating a clear, functional, and social division between the kitchen and the living room. An island acts as a natural boundary for the kitchen’s “work zone” while simultaneously serving as a bridge to the living area, especially when it includes seating. It provides extra counter space for meal prep, a casual dining spot for quick meals, and a place for guests to gather and chat with the cook without getting in the way.
I always tell my clients that a well-designed island is the first element to consider when planning an open-concept space. The side facing the living room can be designed to look more like a piece of furniture, perhaps with decorative paneling or a different countertop material, to help it blend seamlessly with the living room decor.
- Function: Provides a work surface, storage, casual dining, and a clear visual divider.
- Seating: Stools on the living room side create a social hub.
- Style: The design of the island (e.g., waterfall countertop, decorative paneling) can set the tone for the entire space.
For an enhancement, choose a different, more dramatic color for your island cabinetry than the rest of your kitchen cabinets. This will make the island stand out as a beautiful, intentional, furniture-like piece that anchors the entire open-plan room.
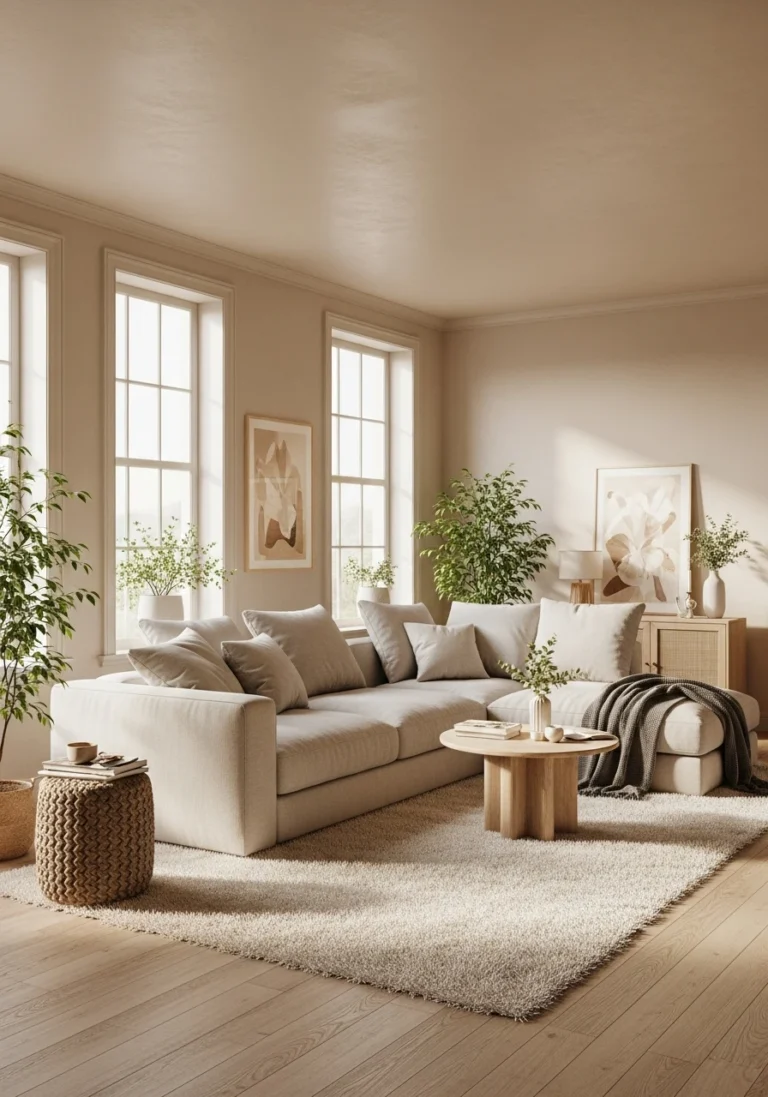
2. Anchor the Living Zone with a Large Area Rug
Once you have your kitchen zone defined, the easiest and most effective way to define your living room zone is with a large area rug. A rug acts as a visual “island” that anchors your sofa, chairs, and coffee table, grouping them together into a cohesive and intentional seating area. This simple addition makes the living room feel like a distinct “room” within the larger open space, creating a cozier and more intimate atmosphere.
The most common mistake I see homeowners make is choosing a rug that is too small. For a successful layout, the rug should be large enough that at least the front legs of all your main seating pieces are resting on it. As the experts at HGTV often advise, a generously sized rug is crucial for making a furniture grouping feel grounded and purposeful, not like it’s just floating randomly in a large room.
- Function: Visually defines the living room zone and adds softness, color, and texture.
- Size is Key: Must be large enough to connect the main seating pieces.
- Placement: The front legs of the sofa and any chairs should be on the rug.
For an enhancement, choose a rug that has a bold pattern or a rich color. In a large, neutral open-plan space, the living room rug is a perfect opportunity to inject a major dose of personality and style.
15 Stylish Moody Living Room Designs for a Luxurious and Chic Look
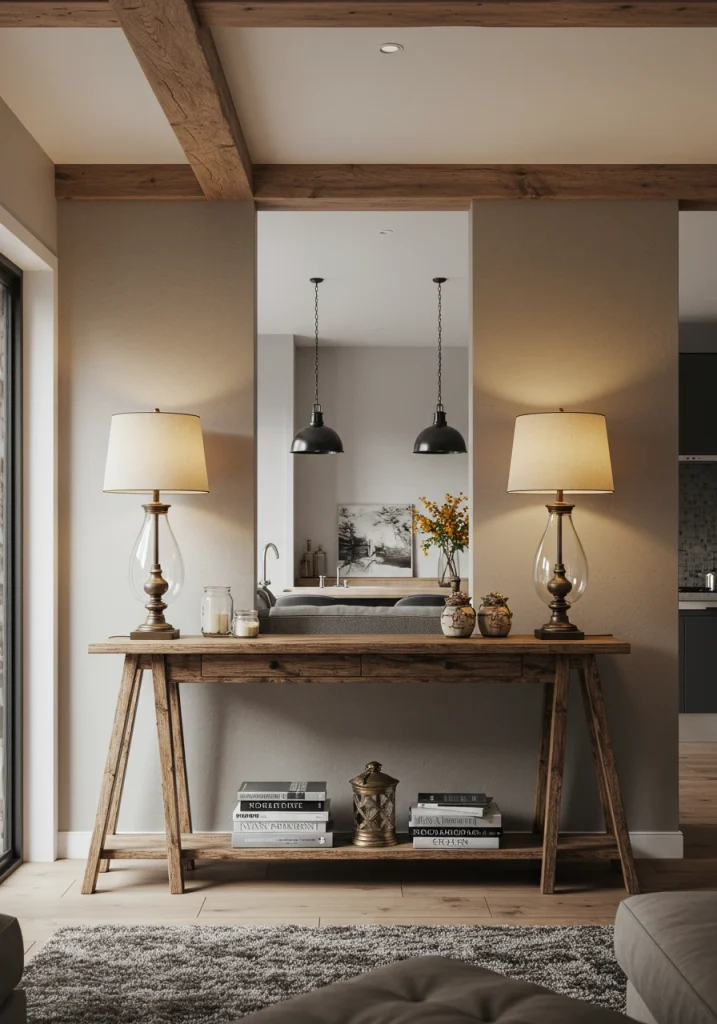
3. Use a Sofa with a Console Table as a Border
In an open-plan layout, the back of your sofa is often exposed and can become a de facto wall. Instead of leaving it bare, placing a slim console table directly against the back of the sofa is a brilliantly smart and stylish way to create a clean, finished border between your living and kitchen/dining zones. This simple addition turns the back of your sofa into a beautiful, functional feature.
This is my go-to trick for making a “floating” sofa feel intentional. The console table provides a perfect surface for placing a pair of matching table lamps, which can add much-needed ambient light to the middle of a large room. It’s also a great spot for displaying decorative objects, a vase of flowers, or even a few family photos.
- Function: Creates a visual and physical border, provides a surface for lighting and decor.
- Placement: The console should be roughly the same height as the back of the sofa and slightly less wide.
- Style: Choose a console in a style and material that complements both the kitchen and living room decor.
For an enhancement that adds function, tuck two small, upholstered stools or ottomans underneath the console table. They will be completely out of the way for daily use, but can be pulled out as extra seating when you have guests.
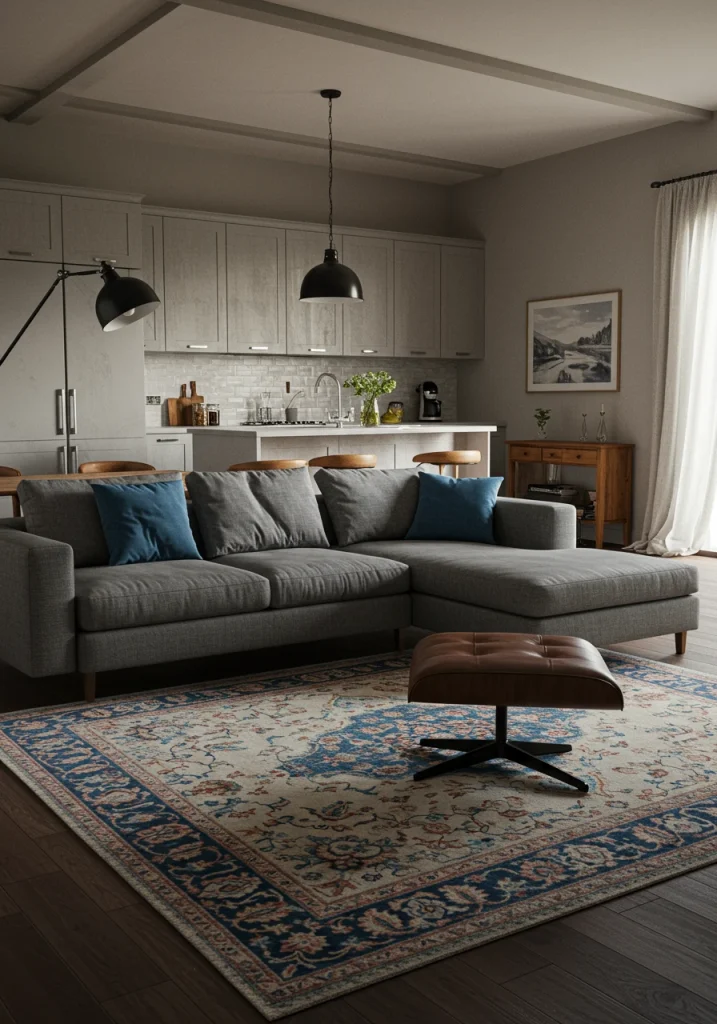
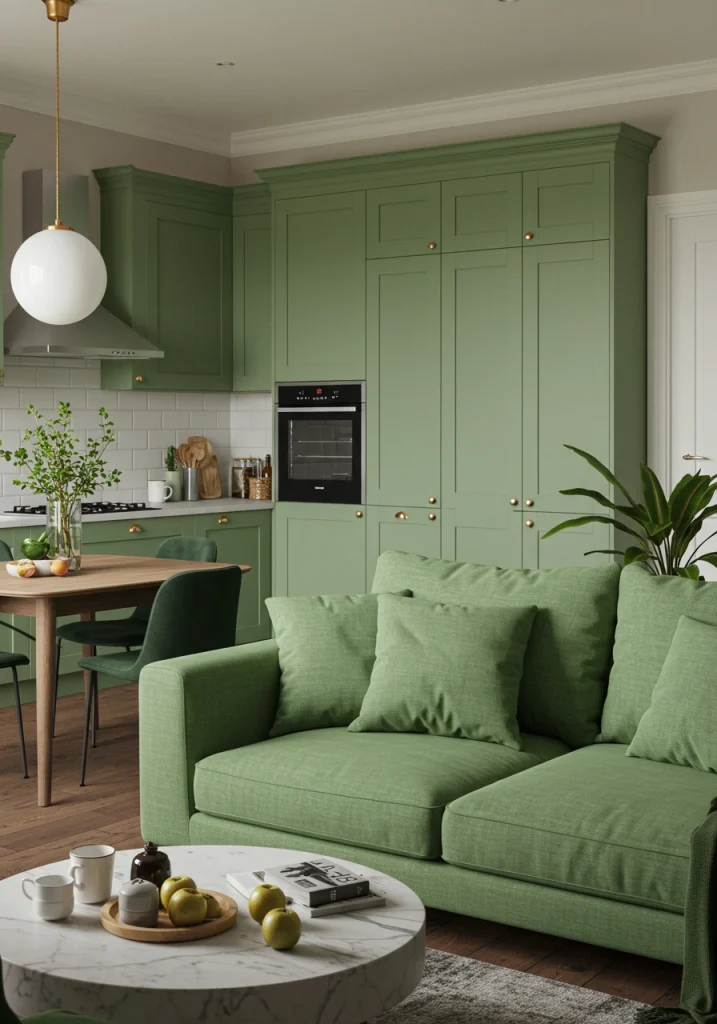
4. Maintain a Consistent Color Palette
To make a large, open-plan space feel cohesive and harmonious rather than disjointed, it’s crucial to use a consistent color palette throughout both the kitchen and the living room zones. This doesn’t mean everything has to be the same color, but the main colors should be repeated and balanced across the entire space. This visual thread is what ties the two functional areas together into one unified great room.
I advise my clients to choose a simple palette of three to four colors and use them in different ways in each zone. For example, the deep navy blue of your kitchen island could be repeated in the throw pillows on your living room sofa. The warm brass of your kitchen cabinet hardware could be echoed in a floor lamp or picture frames in the living area.
- Choose a Palette: Select 3-4 complementary colors to use throughout the space.
- Repeat Colors: Use your main colors in both the kitchen and the living room in varying amounts.
- Create Flow: The consistent palette allows the eye to move smoothly from one zone to the other.
For a sophisticated enhancement, choose one bold accent color and use it in three small, well-placed locations across the entire open plan—perhaps in the kitchen backsplash tile, a pillow on the sofa, and a piece of art on the far wall. This creates a stylish and intentional “visual triangle.”
5. Use Continuous, Uninterrupted Flooring
One of the most important decisions you can make to ensure your living room kitchen combo feels like one large, unified space is to use the same flooring material throughout. Running a single, uninterrupted flooring material—like hardwood, laminate, or large-format tile—from the kitchen through the dining area and into the living room creates a seamless visual foundation. Abruptly changing the flooring at the edge of the kitchen can visually chop up the space and make it feel smaller and more disjointed.
As a designer, this is one of my non-negotiable rules for a successful open plan. A continuous floor allows the eye to travel across the entire space without interruption, which is key to creating that expansive, airy feeling. Modern materials like luxury vinyl plank (LVP) and wood-look porcelain tile are fantastic choices as they provide the warm look of wood with the durability and water resistance needed for a kitchen.
- Creates Flow: A single flooring material is the key to a seamless, unified space.
- Makes Space Feel Larger: Unbroken lines on the floor make the entire area feel more expansive.
- Durable Choices: Choose a material that is durable enough for the kitchen but also warm and comfortable enough for the living room.
For an enhancement, if you use a wood or wood-look flooring, pay attention to the direction you lay the planks. Running the planks parallel to the longest dimension of the room will further enhance the sense of space and flow.

6. Repeat Materials and Finishes
Beyond just color, repeating key materials and finishes throughout your open-plan space is another powerful strategy for creating a cohesive and intentional design. This is about creating a subtle but effective visual dialogue between the kitchen and living room zones. By using the same wood tone, metal finish, or stone type in both areas, you create a sense of rhythm and harmony.
This is a trick I use in all my open-concept projects. For example, if you have open shelving made of warm walnut in your kitchen, use a media console or a coffee table in the same warm walnut in your living room. If you choose a sleek, matte black finish for your kitchen faucet and cabinet hardware, repeat that same matte black in the frame of a mirror, a floor lamp, or the legs of a chair in the living area.
- Wood Tones: Match the wood of your kitchen island to a piece of furniture in the living room.
- Metal Finishes: Repeat the finish of your kitchen hardware (brass, black, nickel) in your living room lighting and accessories.
- Stone: The marble of your kitchen countertop could be echoed in the top of a small side table.
For an enhancement, use a material in an unexpected way. For instance, clad the front of your kitchen island in the same reclaimed wood that you used for a feature wall or floating shelves in your living room. This creates a very strong and custom-looking connection.
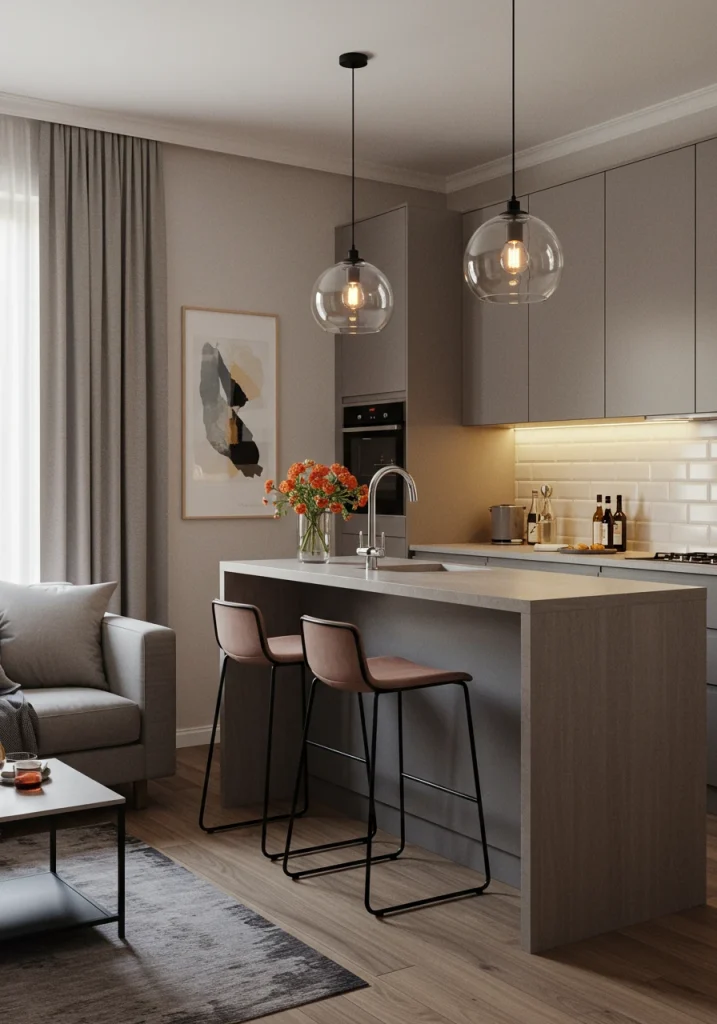
7. Use a Peninsula to Create a Soft Barrier
If your space is not quite large enough for a full island, a kitchen peninsula is a brilliantly effective and space-saving alternative for dividing your kitchen and living room. A peninsula is a counter that is attached to a wall on one end and juts out into the open space. It provides many of the same benefits as an island—extra counter space, a spot for casual seating, and a clear visual divider—but it only requires you to have walkway access on three sides instead of four.
I often recommend a peninsula for smaller, L-shaped kitchen layouts in an open plan. It creates a gentle, “C-shaped” enclosure for the kitchen that feels defined but not closed off. As often seen in apartment and smaller home designs, it’s a very efficient use of space.
- Space-Saving: A great alternative to an island in a smaller or narrower open-plan room.
- Defines the Kitchen: Creates a clear but not solid barrier between the kitchen and living areas.
- Provides Seating: Adding an overhang to the counter on the living room side allows for bar stool seating.
For an enhancement, install a pair of beautiful, statement pendant lights over your peninsula. This will not only provide excellent task lighting for the counter but will also visually reinforce the peninsula as a key transitional zone between the two spaces.
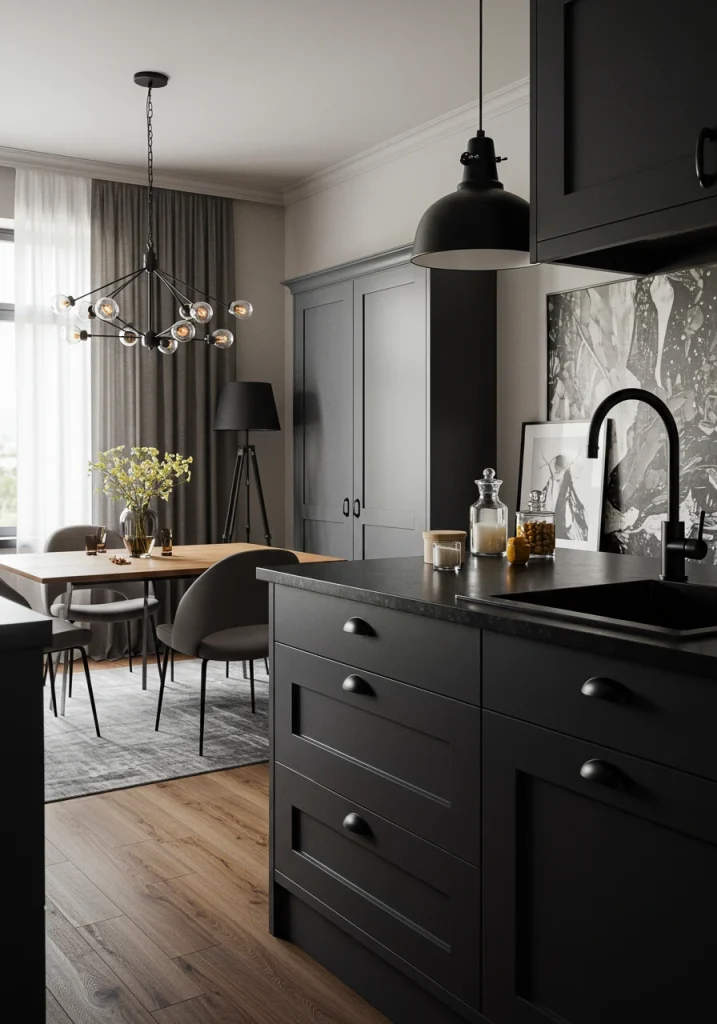
8. Create a Cohesive Lighting Plan
In an open-concept space, your lighting plan needs to be considered as a whole, not as separate plans for each zone. A cohesive lighting plan will not only provide the right kind of light for each functional area but will also help to unify the entire space. The style of your light fixtures should be consistent or complementary across both the kitchen and the living room.
You need to incorporate layers of light in each zone.
- Kitchen: Requires bright, overhead ambient light (like recessed cans), focused task lighting (like pendants over the island and under-cabinet lights), and maybe some accent lighting.
- Living Room: Requires softer, ambient light (from a central fixture or lamps), task lighting (like a reading lamp), and accent lighting (to highlight art).
- Cohesion: The key is to choose fixtures that share a common style, finish, or shape. For example, the brass pendant lights over your kitchen island could be complemented by a brass floor lamp in your living room.
For a dramatic enhancement, use a large, statement chandelier over your living room seating area. This will create a powerful focal point and clearly anchor the living zone, giving it a sense of importance and place within the larger open room.
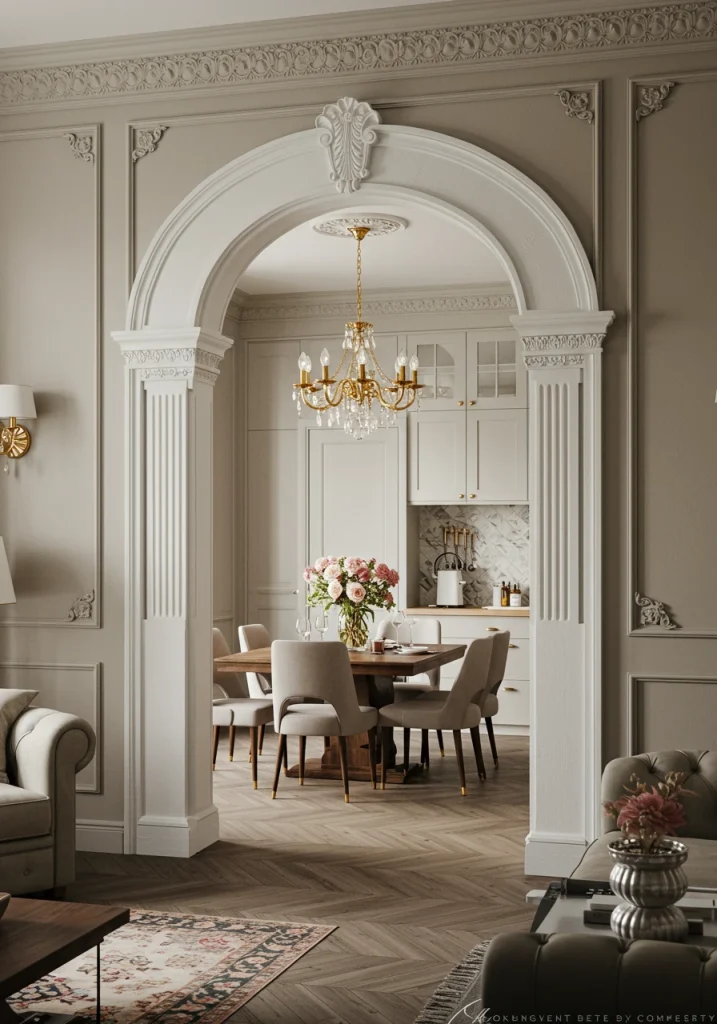
9. Create Architectural Division
If you want a sense of separation that is more substantial than just a piece of furniture, you can use architectural elements to create a partial division without closing the space off completely. A low, half-wall or a series of decorative columns can create a very effective and elegant sense of separation between the kitchen and the living room.
A half-wall is a particularly useful feature. The kitchen side can house extra cabinets or a wine fridge, while the living room side can serve as a backdrop for a sofa or a console table. A pair of simple, cased openings or columns can also create a graceful, traditional threshold between the two zones. I’ve used this technique to give clients the open feel they want, with just a little bit of the structure and definition of a more traditional home.
- Half-Wall: Provides a solid division while maintaining an open sightline above.
- Columns or Cased Openings: Creates a classic, architectural sense of transition.
- Effect: Gives the feeling of two distinct rooms while preserving the open, airy feel.
For an enhancement, cap your half-wall with a beautiful, thick piece of wood or stone countertop. This turns it into a functional serving bar or a beautiful display ledge.
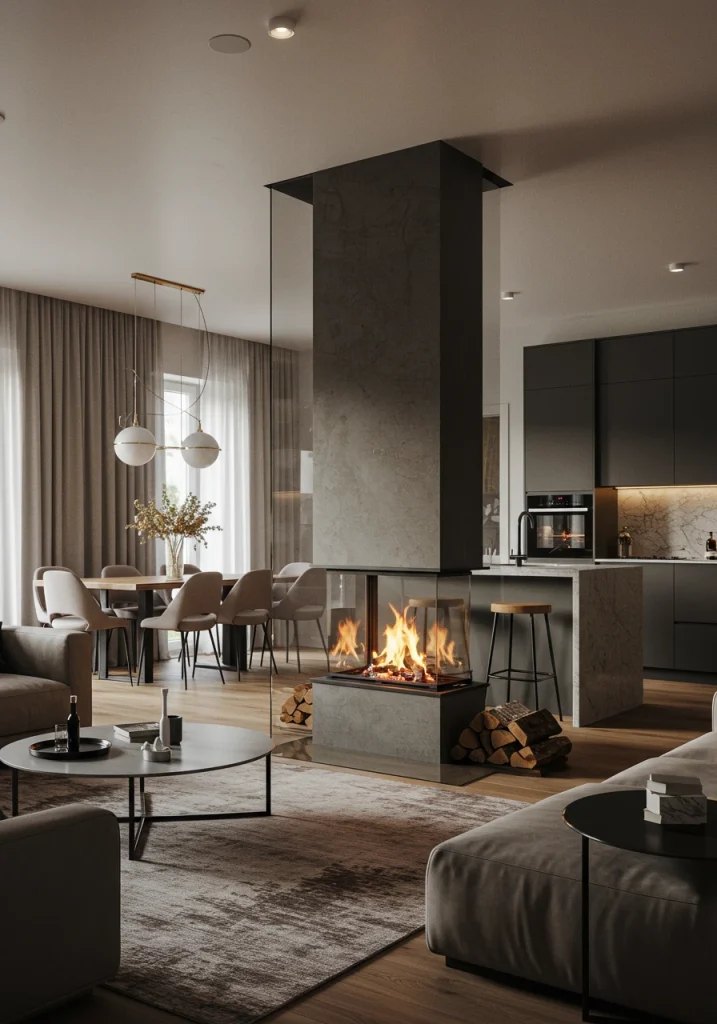
10. The “Broken-Plan” Layout
For those who find a fully open-concept space a bit too noisy or exposed, the “broken-plan” layout is a brilliantly creative solution. This is a design concept that is gaining popularity, and it represents a middle ground between a traditional, closed-off layout and a fully open plan. It seeks to keep the visual connection and flow of an open plan, but uses clever, partial dividers to create a greater sense of separation and intimacy.
This can be achieved with features like a large, double-sided fireplace that you can see through, a set of interior glass and metal doors (like Crittall-style doors) that can be closed or opened, or a large, see-through shelving unit. As a designer, I love this approach because it offers the best of both worlds.
- Best of Both Worlds: The light and flow of an open plan, with the privacy and definition of a closed plan.
- Dividers: Double-sided fireplaces, interior glass walls, or large, open shelving units.
- Effect: Creates defined zones that are still visually connected.
For an enhancement, use a see-through, floor-to-ceiling shelving unit as your divider. Style it with a mix of books, plants, and decorative objects, but be sure to leave plenty of empty “negative space” so you can still see through to the other side.
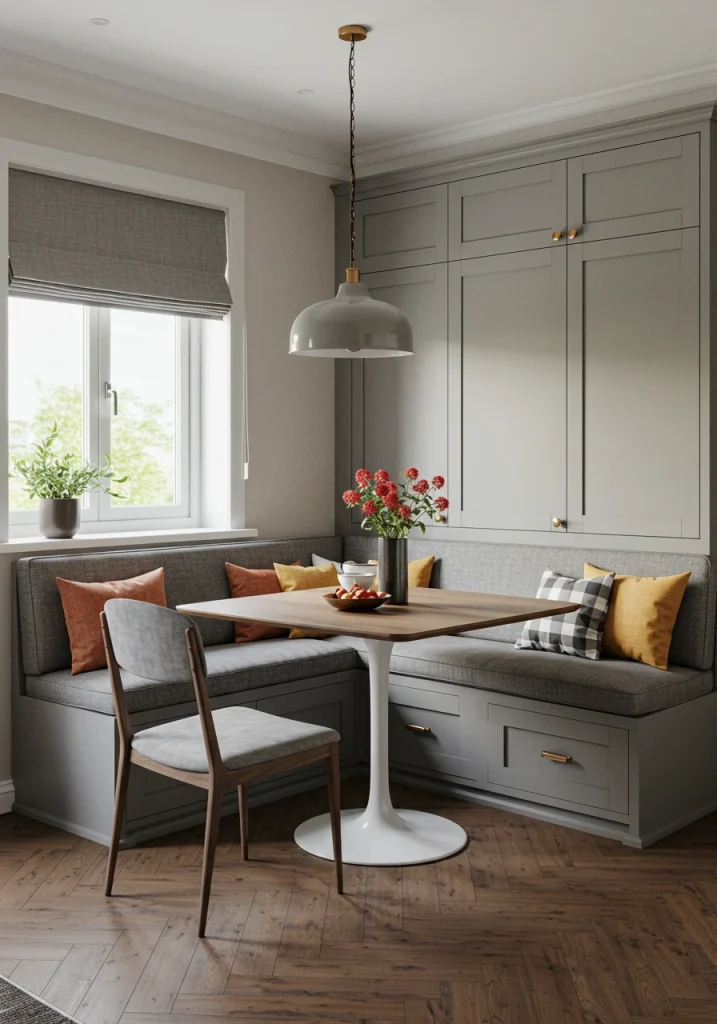
11. A Built-in Banquette for Dining
In many living room kitchen combos, there’s an awkward transitional space that is meant for a dining table but can be difficult to furnish. A built-in banquette, or booth-style seating, is a fantastic, space-saving, and stylish solution. By building a bench directly against a wall, you can push your dining table closer to the wall, which saves a huge amount of floor space compared to having chairs that need to be pulled out on all four sides.
A banquette also provides a very cozy and intimate dining experience, reminiscent of a favorite cafe or restaurant. I love to design banquettes with a lift-top seat or drawers underneath to sneak in a huge amount of hidden storage—perfect for stashing away placemats, board games, or seasonal decor.
- Space-Saving: Allows you to push your dining table closer to the wall, saving valuable floor space.
- Cozy Seating: Creates a comfortable and intimate dining nook.
- Storage Potential: The bench can be designed with hidden storage underneath.
For a comfortable and stylish enhancement, add a custom, upholstered seat cushion and a collection of comfortable throw pillows to your banquette. This adds softness, color, and makes it an even more inviting place to linger.
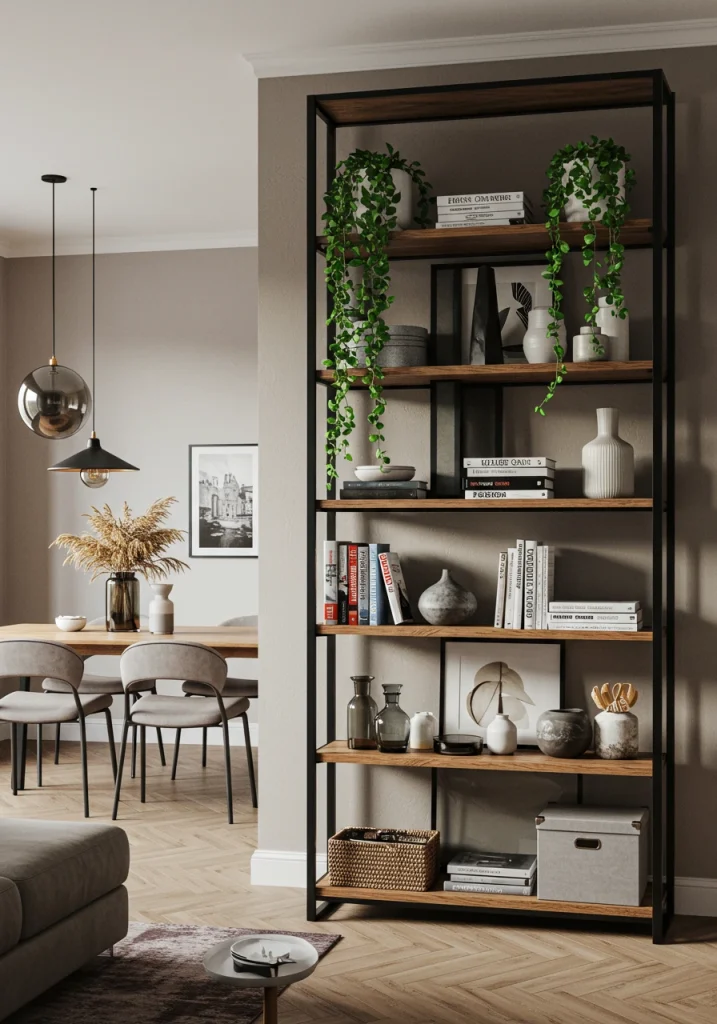
12. Use a See-Through Bookcase as a Screen
For a divider that is functional, stylish, and maintains an open, airy feel, a tall, open-backed shelving unit or bookcase is a perfect choice. This type of furniture acts as a visual screen, creating a clear sense of separation between your kitchen and living room zones, but because you can see through it, it doesn’t block light or sightlines. This is a favorite solution in small, open-plan apartments and homes.
This is a wonderfully flexible solution. You can style the shelves with a mix of books, plants, and decorative objects. I always advise my clients to not over-clutter the shelves. Leaving plenty of “negative space” is key to maintaining that light and airy feeling.
- Flexible Division: Creates separation without building a wall.
- Maintains Openness: Doesn’t block light or the view.
- Provides Storage and Display: A hardworking, functional piece of furniture.
As an enhancement, use a bookcase with an interesting, asymmetrical, or geometric shelving pattern. This will make the divider feel more like a sculptural piece of modern art.
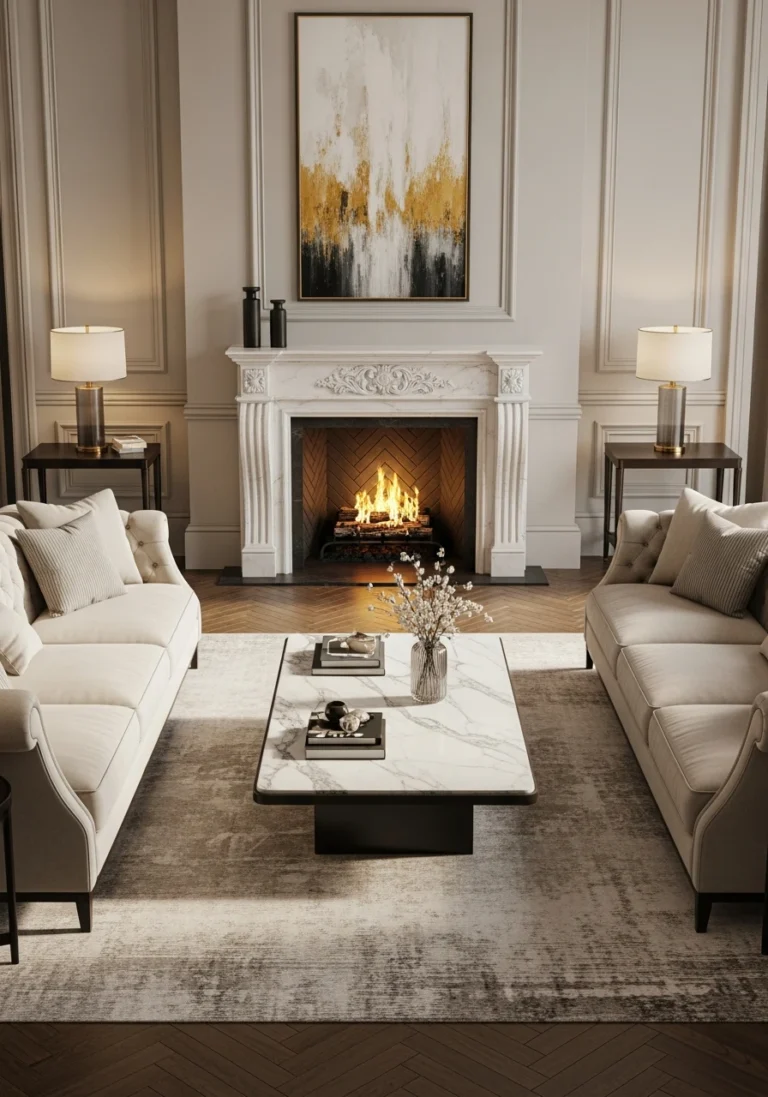
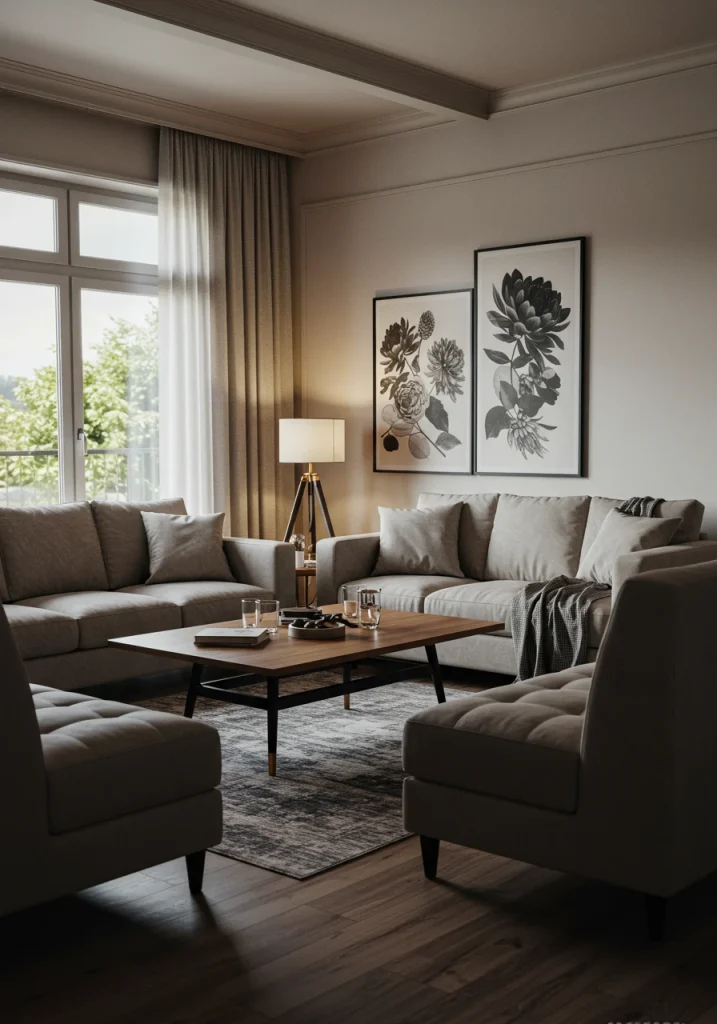
13. Orient Furniture for Conversation
In an open-plan space that can sometimes feel vast and impersonal, it’s important to arrange your living room furniture in a way that encourages human connection. Instead of having all of your seating pushed against the walls and facing the TV, pull your furniture together into a more intimate grouping that is conducive to conversation.
This is a core principle of good interior design. Your main sofa and any armchairs should be arranged so that they are facing each other, or at least angled towards each other. People should be able to sit and talk comfortably without having to shout across the room. I aim for a comfortable conversation distance of no more than 8-10 feet between seating pieces.
- Create a Grouping: Pull your furniture away from the walls and group it closer together.
- Face-to-Face: Arrange sofas and chairs so they are facing each other.
- Anchor with a Table: Place a coffee table in the middle of the grouping, within easy reach of all seats.
For an enhancement, use two smaller-scale loveseats facing each other instead of one large sofa. This creates a very classic and elegant symmetrical layout that is absolutely perfect for conversation.
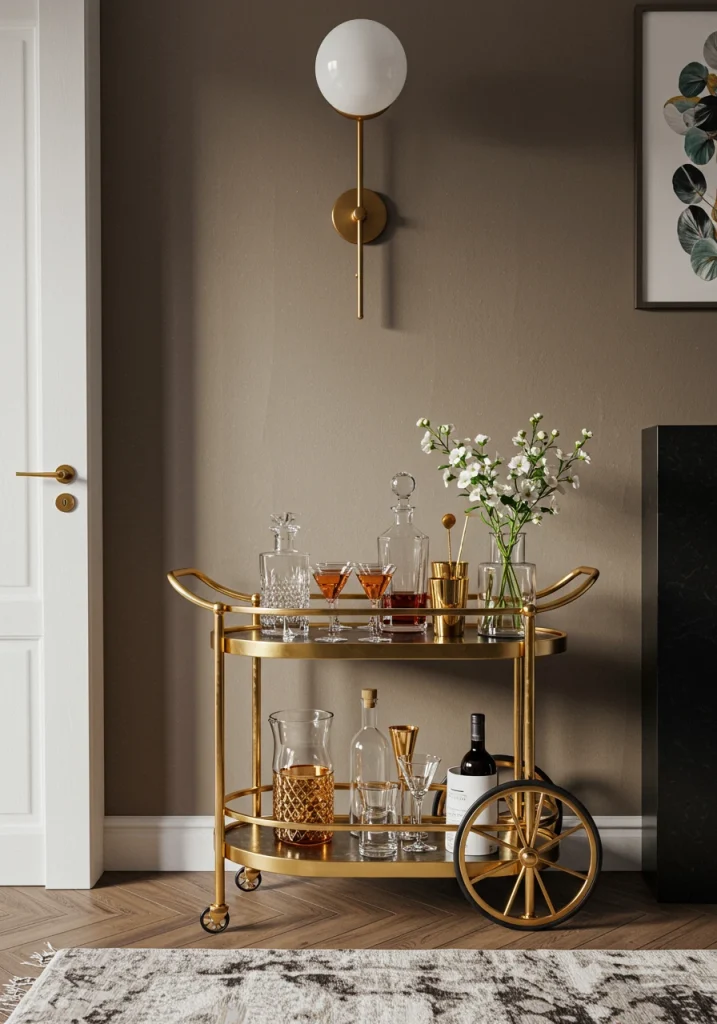
14. Use a Bar Cart for a Mobile Drink Station
In an open-plan home, entertaining often flows from the kitchen to the living room. A stylish and mobile bar cart is a fantastic, flexible piece that can serve both zones. You can keep it in a corner of your dining or living area as a beautiful, decorative object, and then easily roll it closer to the action when you have guests.
A bar cart is more space-efficient and less visually heavy than a full, built-in bar. I love styling them not just with barware, but also with a small lamp, a vase of flowers, or a few books to make them feel like a curated piece of furniture. It’s a touch of vintage glamour that is both stylish and incredibly functional.
- Flexibility: Can be easily moved between the kitchen, dining, and living zones.
- Space-Saving: Much smaller than a built-in bar.
- Style: Adds a touch of glamour and a designated spot for entertaining.
For a cohesive enhancement, choose a bar cart with a metallic finish (like brass or black) that matches the hardware and lighting finishes in your kitchen. This will create a beautiful, intentional visual link between the two spaces.
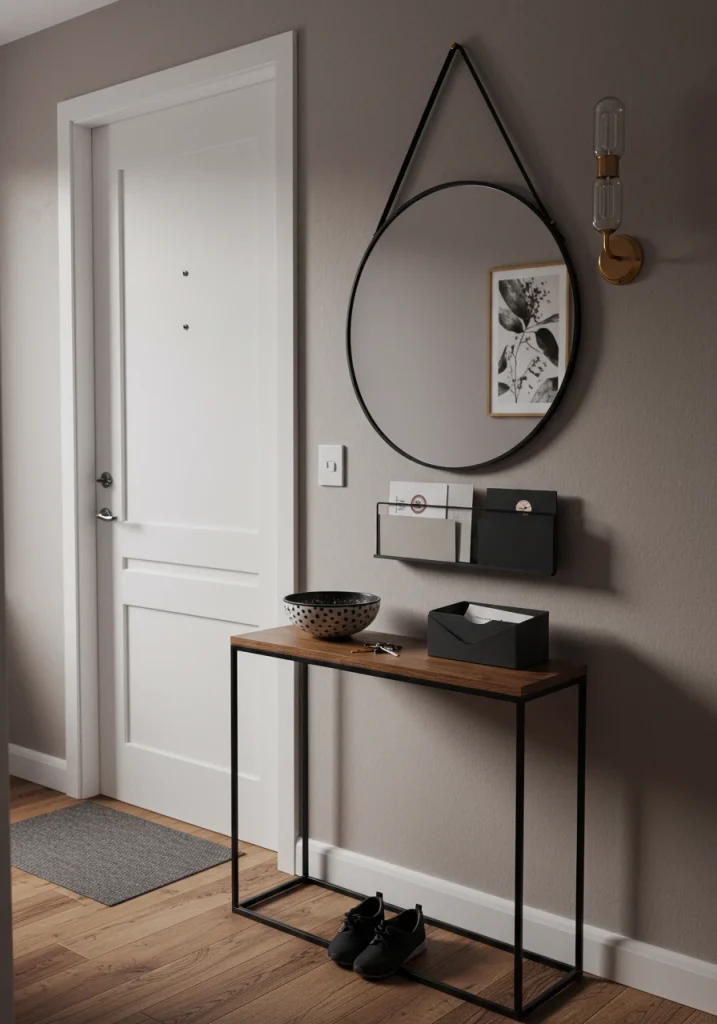
15. Create a Small “Drop Zone” Near the Entry
In an open-plan home, the entryway often flows directly into your living room and kitchen, which means there’s no dedicated mudroom to contain the clutter of daily life. This can lead to keys, mail, and bags being dumped on the kitchen island or the coffee table. A smart solution is to create a small, designated “drop zone” right near the main entrance.
This doesn’t need to be a large area. A very slim console table against a small section of wall, a single floating shelf with a few hooks underneath, or even just a beautiful, large tray on a bench can serve as the official spot for all the things you bring in and take out of the house each day. As I always tell my clients, giving clutter a designated home is the first step to conquering it.
- Purpose: A designated spot for keys, mail, phones, and sunglasses.
- Location: As close to the main entry door as possible.
- Elements: A small surface (shelf or table), a bowl or tray for small items, and a few hooks.
For an enhancement that defines the space, hang a beautiful, round mirror on the wall above your drop zone table or shelf. This will not only be a practical spot for a last-minute check before you leave, but it will also visually anchor your drop zone and make it feel like an intentional, stylish vignette.
Conclusion
Mastering the living room kitchen combo is about finding the perfect harmony between open, airy connection and cozy, functional definition. As we’ve explored through these 15 smart ideas, a successful open-plan design is a thoughtful composition of clever zoning strategies and cohesive design elements.
By using tools like kitchen islands, large area rugs, and strategic furniture placement to define your zones, and then tying the whole space together with a consistent color palette, flooring, and lighting plan, you can create a “great room” that truly lives up to its name.