Are you looking for simple backyard landscaping ideas that can deliver a stunning transformation without requiring a professional crew or a bottomless budget? The idea of landscaping can often feel overwhelming, conjuring images of complex plans and back-breaking labor.
But creating a beautiful, inviting, and functional outdoor space doesn’t have to be complicated. In fact, some of the most effective and beautiful backyard designs are built on a foundation of simple, well-executed ideas. It’s about working smarter, not harder, to create a personal oasis you can truly enjoy.
This guide is designed for the beginner and the busy homeowner, offering 15 straightforward yet stunning ideas. From the transformative power of a clean edge to the magical ambiance of string lights, these projects are achievable, affordable, and guaranteed to refresh your outdoor space with style.
1. Define Your Garden Beds with Crisp Edges
This is the simplest, cheapest, and most impactful thing you can do to make your entire backyard look instantly neater and more professional. A clean, crisp edge between your lawn and your garden beds creates a strong, deliberate line that brings a sense of order to the entire landscape.
It’s the difference between a yard that looks neglected and one that looks cared for. A defined edge contains your mulch, keeps the lawn from creeping into your beds, and makes mowing significantly easier.
I always tell my beginner clients to master this basic skill first. A simple spade-cut edge is a classic technique that costs nothing but a bit of effort. The visual return on this simple task is enormous.
- How to Implement: Lay a garden hose on the ground to outline the shape of your bed. Use a flat-edged spade or a half-moon edger to cut a clean, 4-6 inch deep trench along the line. Remove the strip of sod.
- Benefits: Instantly creates a neat, manicured look; contains mulch and soil; makes mowing easier.
- Frequency: Redefine your cut edges once or twice a season to keep them sharp.
For a more permanent and even lower-maintenance enhancement, install a simple, flexible landscape edging made of metal or recycled plastic along your cut line. This creates a permanent barrier that will keep your beds looking sharp for years.

2. Apply a Fresh Layer of Mulch
Once your beds are cleanly edged, applying a fresh, 2-3 inch layer of mulch is the next step to a stunning, low-maintenance garden. Mulch is a landscaper’s best friend. It dramatically reduces the amount of time you’ll spend weeding by smothering new growth.
It helps the soil retain moisture, meaning you’ll need to water less often. Aesthetically, a uniform layer of rich, dark mulch creates a cohesive, high-contrast backdrop that makes the green foliage and colorful flowers of your plants pop.
This is an inexpensive project that provides huge visual and practical benefits. I recommend doing this once a year, in the spring, to refresh the look of your beds and replenish the organic matter.
- Types of Mulch: Shredded hardwood, cedar, or pine bark are all excellent, long-lasting choices.
- Application: Spread an even layer, 2-3 inches deep, over the entire surface of your garden beds.
- Technique: Be sure to pull the mulch an inch or two away from the base of your shrubs and perennials to prevent stem rot.
For an enhancement, use a natural, undyed, double-shredded hardwood mulch. It has a beautiful, dark brown color that looks very professional and breaks down over time to enrich your soil with valuable organic matter.

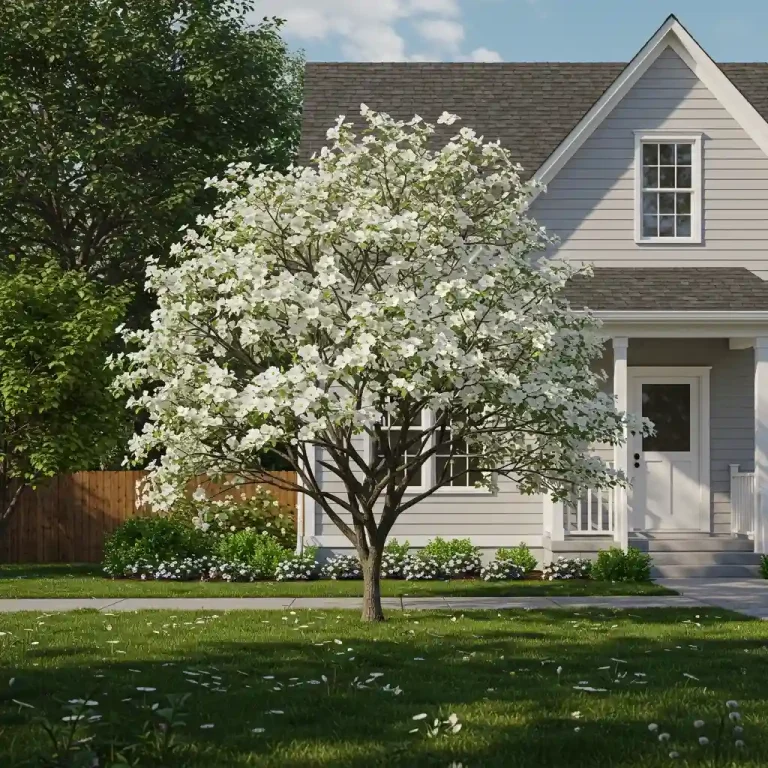
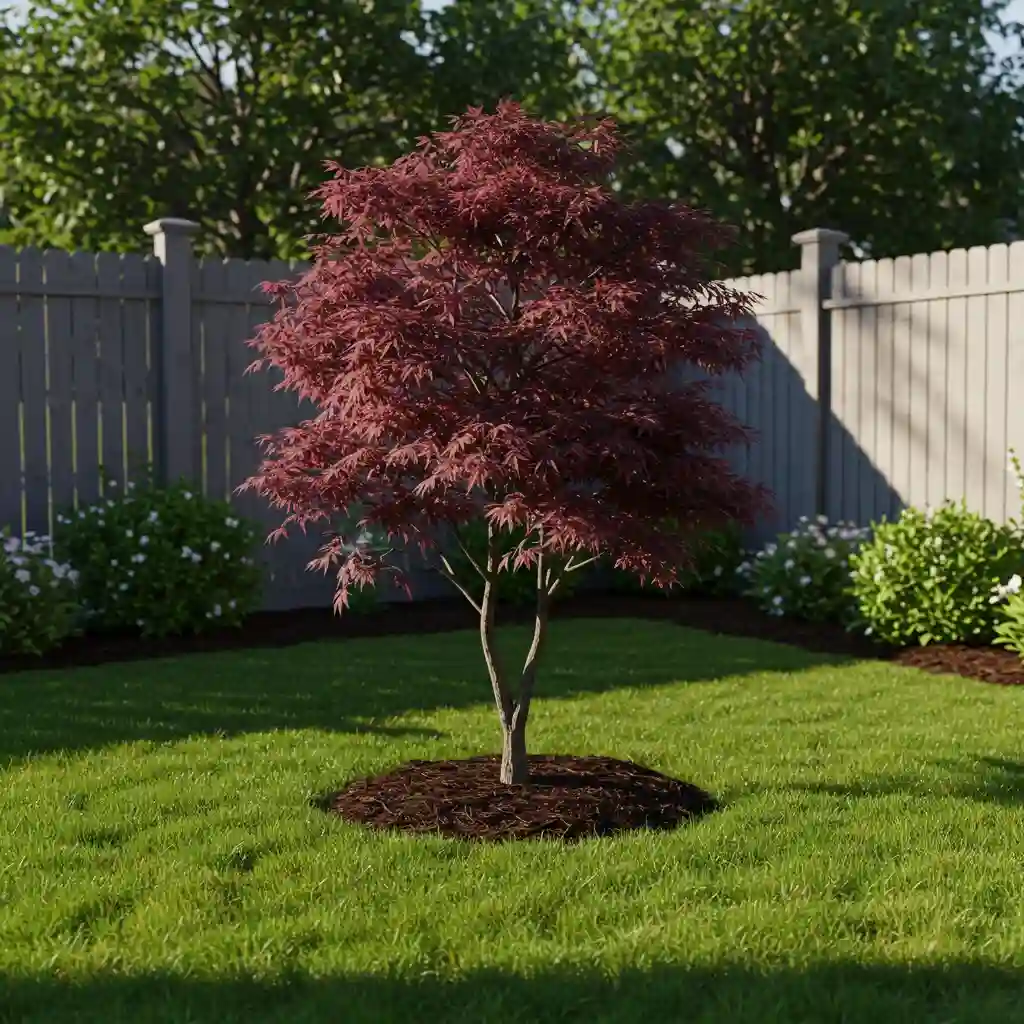
3. Plant a Small Ornamental Tree
Every garden, no matter how simple, can benefit from a focal point, and a small ornamental tree is a perfect choice. A tree adds a much-needed vertical element to a flat yard, provides a sense of maturity and permanence, and can offer beautiful seasonal interest with spring flowers, summer shade, colorful fall foliage, or interesting winter bark.
You don’t need a massive oak or maple. I always suggest that clients with simple yards choose a small- to medium-sized tree that won’t overwhelm the space. A single, well-placed tree can anchor your entire landscape design.
- Great Choices for Small Yards: Japanese Maple, Dogwood, Crabapple, Redbud, or a multi-stemmed Serviceberry.
- Placement: Place it in a corner of the yard or in a garden bed where it can be a focal point, but be mindful of its mature size and don’t plant it too close to the house.
- Benefits: Adds height, shade, seasonal interest, and a habitat for birds.
For an enhancement, create a simple, circular mulch ring around the base of your new tree. This will protect its trunk from damage from mowers or string trimmers and will help the soil around its roots retain moisture.
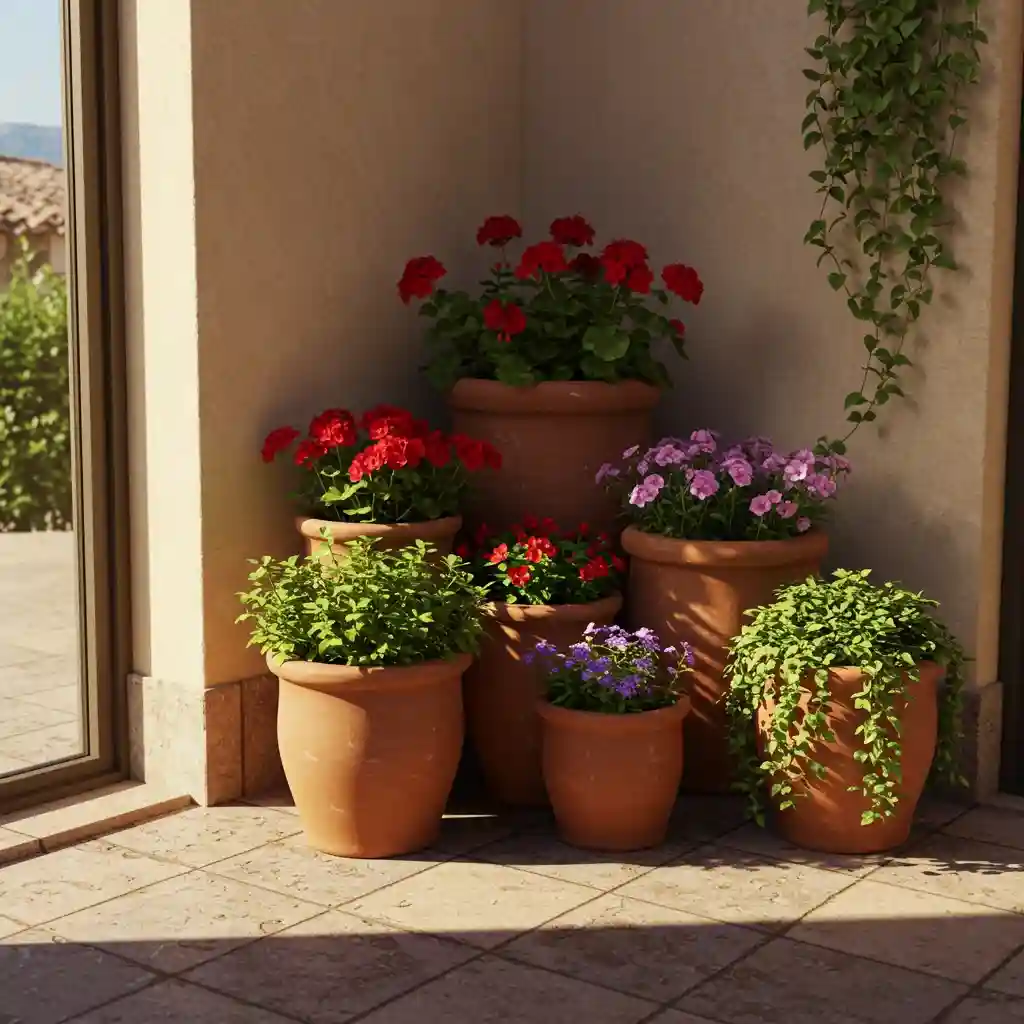
4. Group Containers for an Instant Garden
If digging up a new garden bed feels too intimidating, container gardening is your best friend. It’s an incredibly easy and flexible way to create an instant garden on a patio, a deck, or even just in a sunny corner of your yard. The key to making containers look stunning and not like a cluttered afterthought is to group them together.
I always advise beginners to follow the “rule of three” (or any odd number). A curated cluster of three or five pots in varying sizes creates a much more powerful and intentional design statement than a single, lonely pot. This approach, celebrated by garden experts at Better Homes & Gardens, allows you to create a lush, layered look in a very small space.
- Vary the Size: Use a mix of large, medium, and small pots in your grouping.
- Cohesive Style: Choose pots made of a similar material (like all terracotta) or in a consistent color palette (like all gray and white).
- “Thriller, Filler, Spiller”: Use this simple recipe to create a beautiful, professional-looking plant combination in your largest pot.
For an enhancement, place your tallest pot at the back of the cluster and your smallest at the front. You can even use a few bricks or a small, overturned pot to elevate one of the back containers, which will add another layer of height and dimension to your grouping.
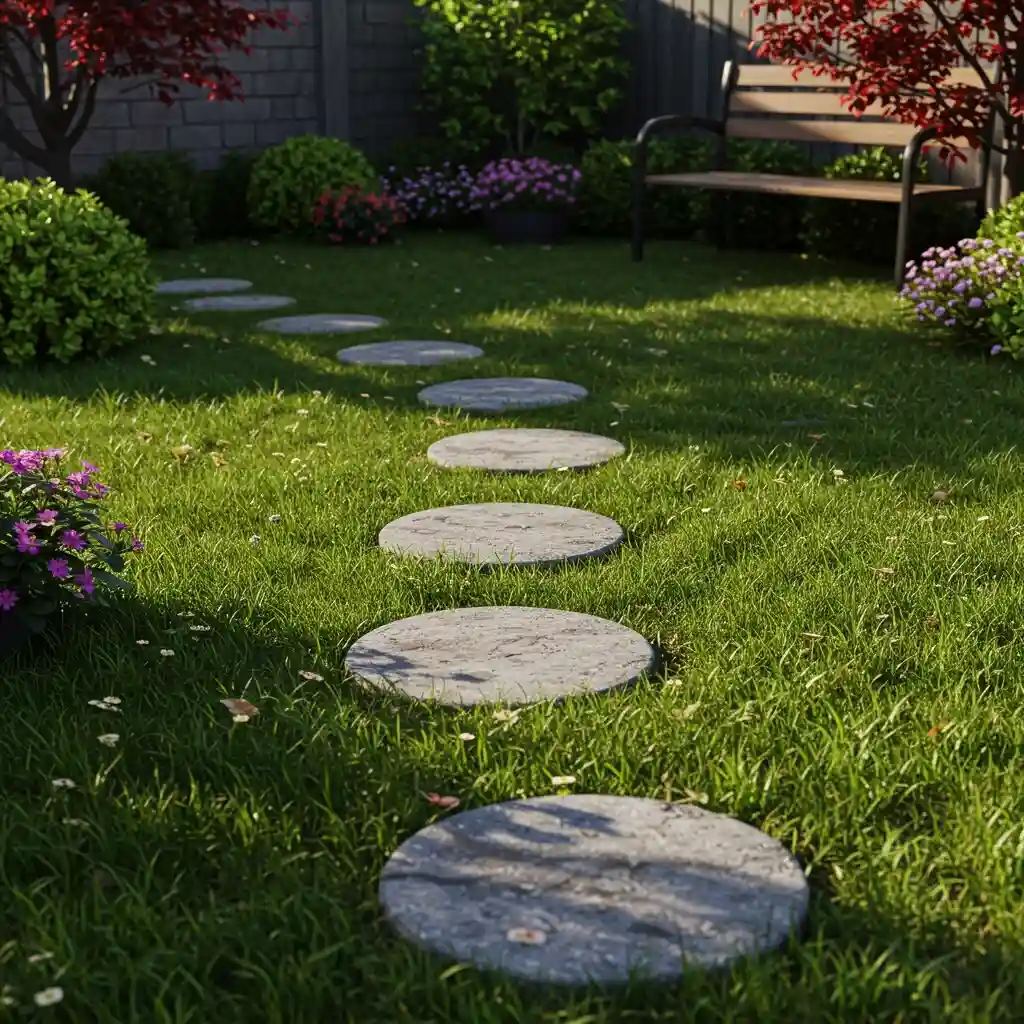
5. Lay a Simple Stepping Stone Path
A pathway adds both charm and function to a backyard. It guides visitors through the space, creates a clear route across the lawn, and can connect different areas like your patio and a garden shed. The easiest and most beginner-friendly type of path to install is a simple stepping stone path. This is a project that can easily be completed in an afternoon and requires very few tools.
I love the informal, rustic look of a stepping stone path. You can use large, irregular flagstones for a naturalistic feel, or simple, square concrete pavers for a more modern look. The key is to space them correctly for a comfortable and natural walking stride.
- Plan Your Path: Lay your stepping stones out on top of the lawn first to perfect the placement and spacing.
- Cut the Outline: For each stone, use a spade or a knife to cut its outline into the grass.
- Remove the Sod: Set the stone aside and dig out the sod and a bit of soil, so the stone will sit flush with or slightly above the ground.
- Level and Set: Add a thin layer of sand to the hole to create a level base, then place the stone in and press it down firmly.
For a charming enhancement, plant a very low-growing, durable groundcover, like creeping thyme or Irish moss, in the small gaps around your stepping stones. This will soften the edges of the path and make it feel more integrated into the landscape.
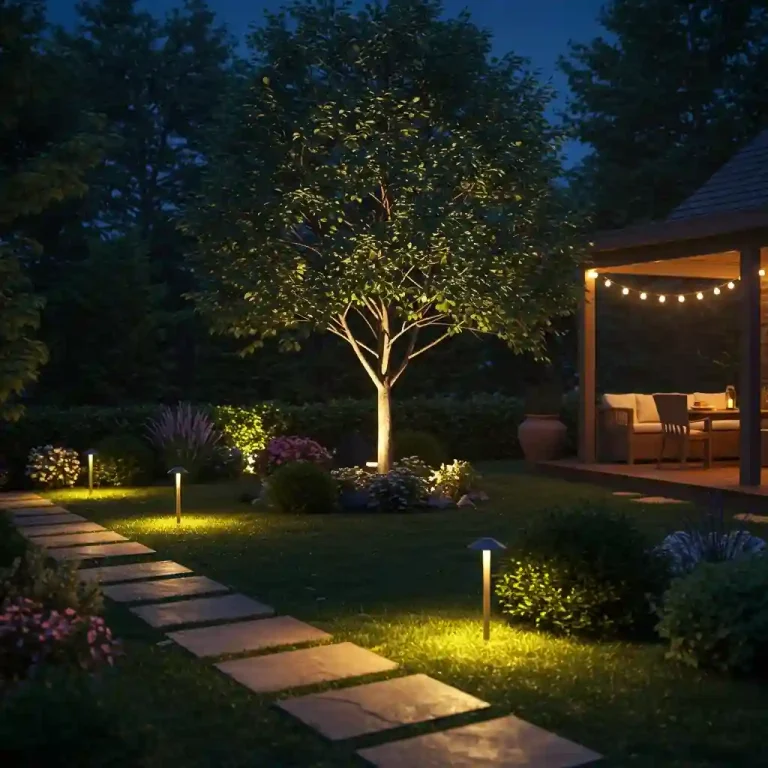
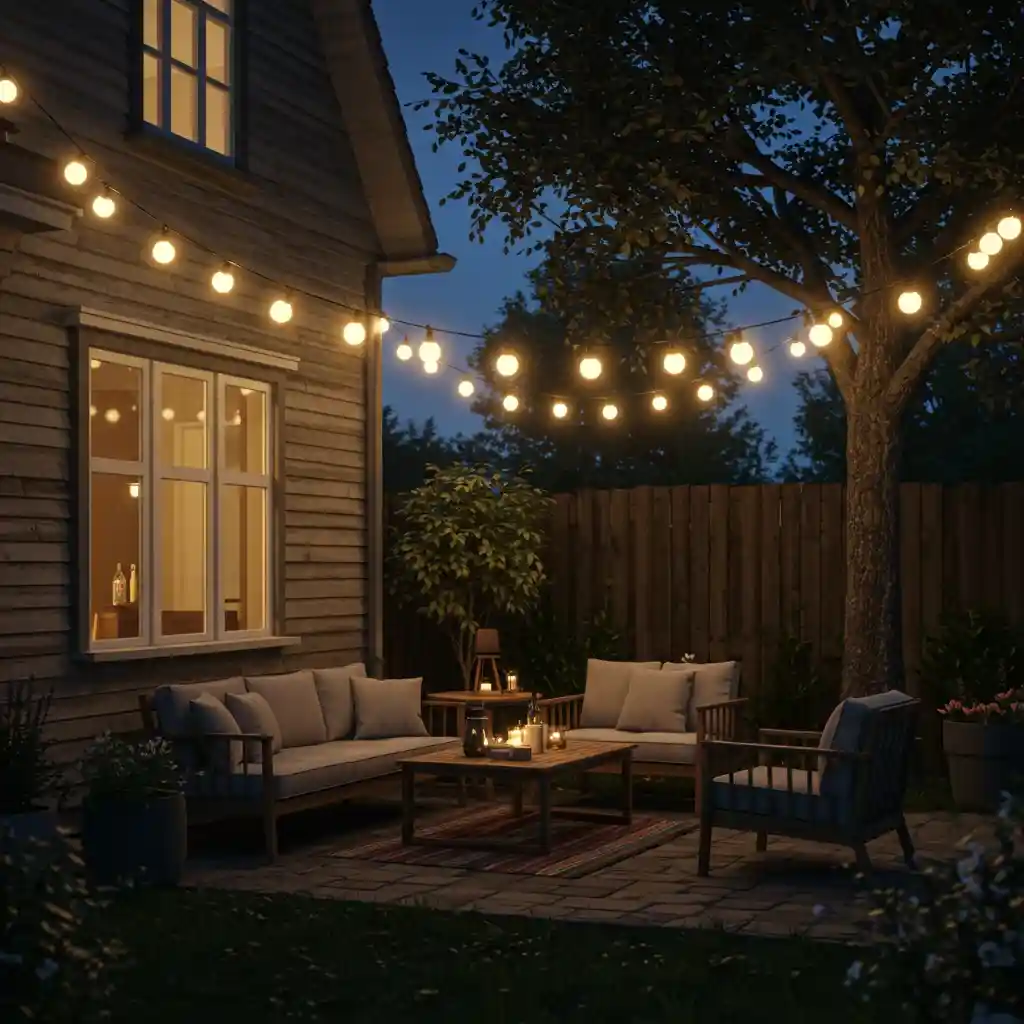
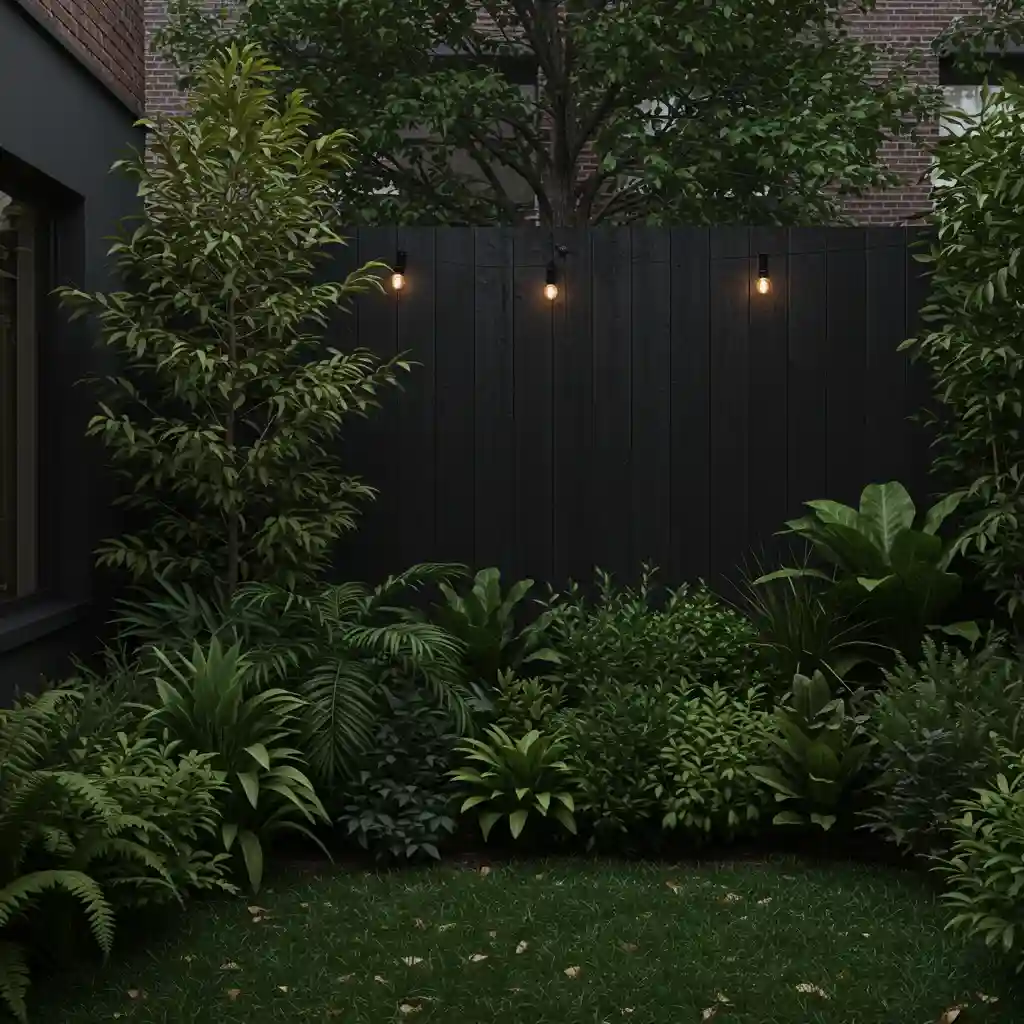
6. Hang Outdoor String Lights
This is the easiest, highest-impact, and most magical project a beginner can do to transform their backyard. A set of outdoor string lights can instantly turn a simple yard into a charming, inviting, and usable space in the evening. There is no other single element that adds so much ambiance for such a small cost and effort.
The warm, golden glow of cafe-style globe lights is perfect for creating a cozy, bistro-like atmosphere. You can string them from your house to a fence, between two trees, or you can install a couple of simple wooden posts set in planters with concrete to create hanging points anywhere in your yard. I tell everyone that this is a must-do; it will completely change how you use your backyard after dark.
- Solar or Plug-in: Solar is the easiest option, requiring no outlets. Plug-in versions are often a bit brighter.
- Style: Classic globe lights are the most popular. Delicate “fairy lights” can also be used for a more whimsical look.
- Placement: String them overhead in a zig-zag or a fan pattern for the best, canopy-like effect.
For a simple enhancement, use a smart outdoor plug for your string lights. This will allow you to turn them on and off with your phone or set them on an automatic schedule, so your backyard is magically lit up every evening.
7. Plant Hardy, Low-Maintenance Perennials in Groups
For a beginner who wants beautiful flowers without having to replant them every year, hardy, low-maintenance perennials are the answer. Perennials are plants that come back year after year, often getting bigger and better with each season. They are a fantastic, budget-friendly, long-term investment for your garden. The key is to choose tried-and-true varieties that are known to be tough and reliable.
The most important design tip for planting perennials is to plant them in groups. I always tell my clients to resist the “polka dot” effect of planting one of everything. A group of three, five, or seven of the same type of plant will create a much more powerful, natural, and cohesive drift of color, which is a secret the pros at HGTV use all the time.
- Great Beginner Perennials: Hostas (for shade), Daylilies, Black-Eyed Susans, Coneflowers, Sedum ‘Autumn Joy’, and Catmint.
- Read the Tag: The plant tag will tell you everything you need to know about the plant’s sun and water needs.
- Plant in Odd-Numbered Groups: For the most natural look, always plant in groups of 3, 5, 7, and so on.
For an easy enhancement, choose a few perennials that have interesting foliage in addition to their flowers. The colorful leaves of plants like Heuchera (Coral Bells) or the silvery foliage of Lamb’s Ear will provide color and texture in your garden even when the plant is not in bloom.

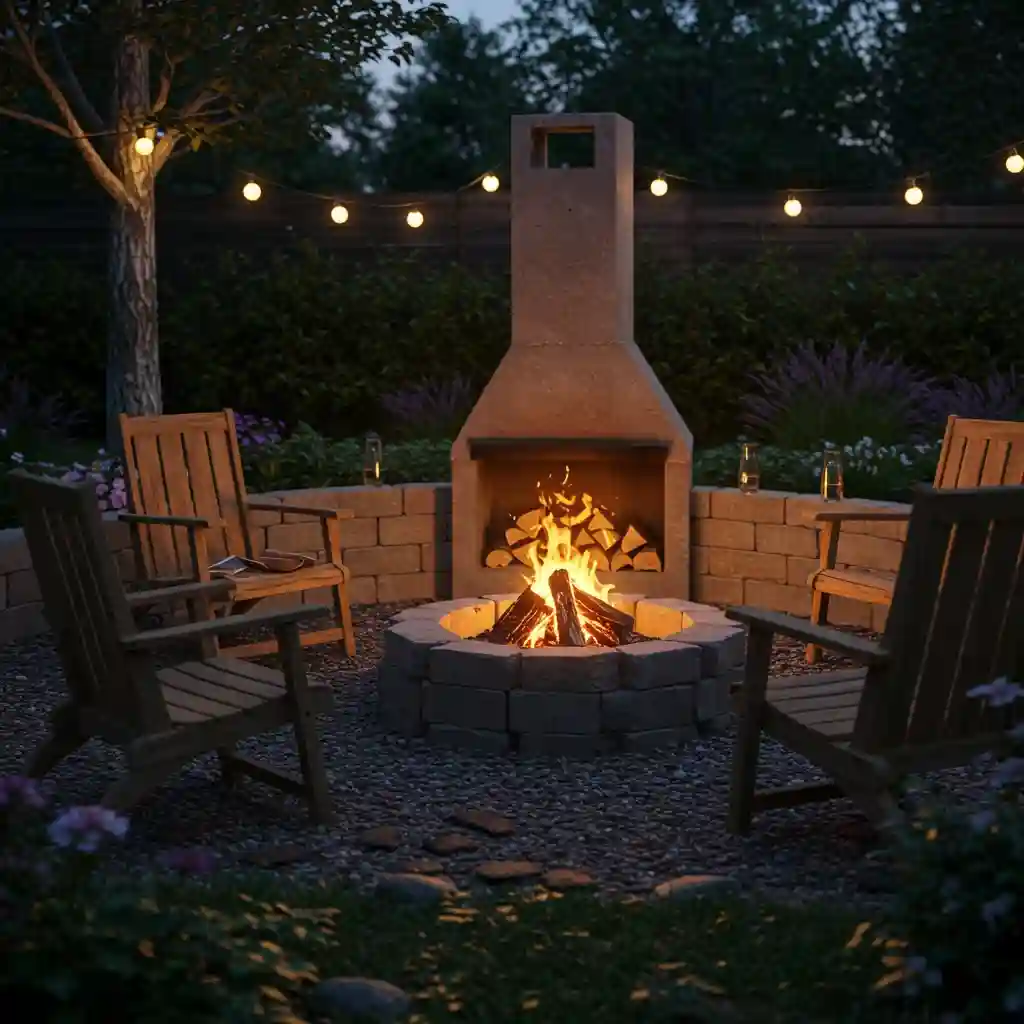
8. Build a Simple DIY Fire Pit
A fire pit is a natural gathering spot that can make your backyard the go-to destination for friends and family on cool evenings. You don’t need to spend a lot of money on a fancy, pre-made fire pit. A simple, rustic, and incredibly durable fire pit can be built yourself in an afternoon using concrete wall blocks or pavers from a hardware store.
This is a classic and very popular DIY project, and you can find detailed tutorials on sites like Bob Vila or The Home Depot. The process involves creating a level ring of sand or gravel as a base and then simply dry-stacking the concrete blocks in a circle, typically three or four layers high. It creates a safe, contained pit for a classic, wood-burning fire.
- Materials: Concrete retaining wall blocks (the kind with a lip on the back work well), sand or gravel for the base.
- Safety: Ensure your DIY fire pit is built on a level, non-flammable surface and is a safe distance from your house, trees, and fences.
- Cost-Effective: Significantly cheaper than buying a pre-made fire pit of a similar size.
For an enhancement, buy the optional metal fire pit ring insert. This steel ring sits inside your block structure and protects the concrete from the direct, intense heat of the fire, which will make your DIY fire pit last much longer.
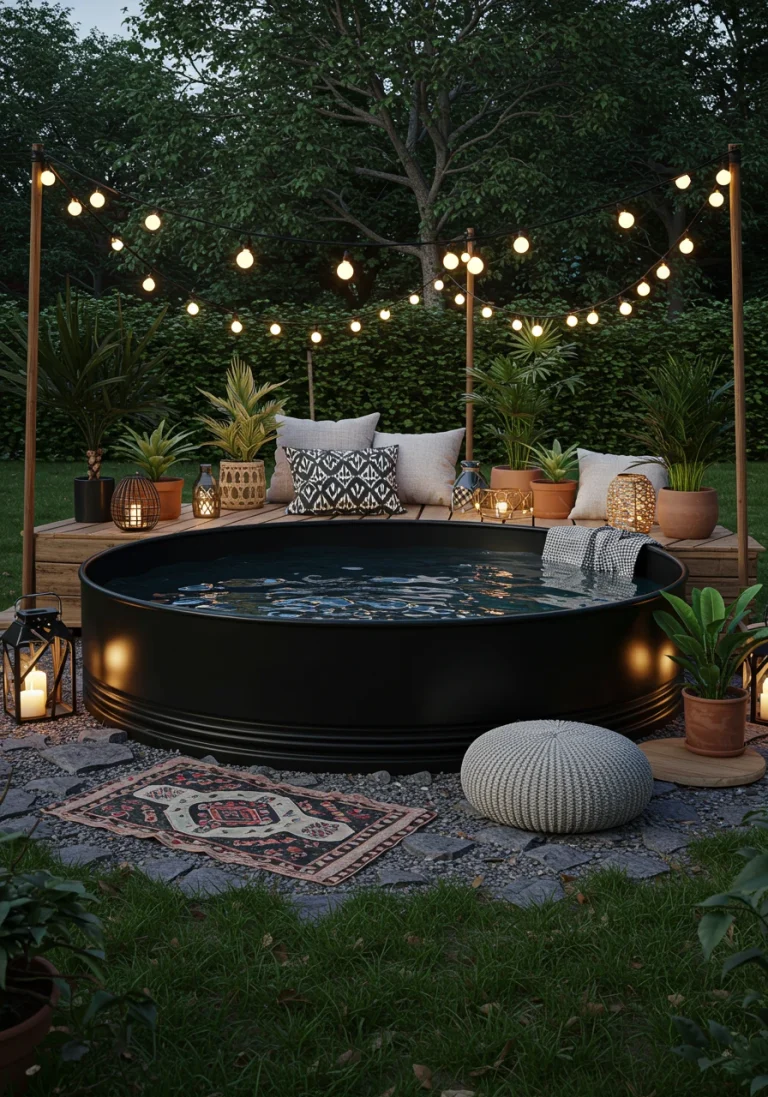
9. Use an Outdoor Rug to Define a Seating Area
One of the quickest and most effective ways to make a backyard or patio feel like an intentional, finished “room” is to lay down an outdoor rug. A rug instantly defines the seating or dining area, adds a layer of softness and color underfoot, and makes the space feel like a true extension of your indoor living area. It’s a simple addition that requires no skill but has a huge impact on the overall coziness and style of your space.
Modern outdoor rugs are incredibly durable, made from weather-resistant and fade-resistant materials like polypropylene, so they can handle the elements with ease. For a client with a simple, concrete patio, we used a large outdoor rug with a bold, geometric pattern. It immediately warmed up the cold concrete, added a major pop of personality, and visually anchored her small bistro set, making the whole space feel more cohesive and inviting.
- Choose the Right Material: Look for rugs made from polypropylene, polyester, or other synthetic fibers designed for outdoor use.
- Select the Right Size: The rug should be large enough that at least the front legs of all your main seating pieces can rest on it.
- Consider Pattern and Color: A bold pattern can be a great way to add personality to a small, neutral space.
For an enhancement, coordinate the colors in your outdoor rug with the colors of your outdoor pillows or your container flowers. This is a simple trick that will make your entire design feel very cohesive and professionally styled.

10. Create a Simple Privacy Screen
Even if you have a friendly relationship with your neighbors, a bit of privacy can make your backyard feel much more like a personal, secluded retreat. You don’t need a massive, expensive fence. A simple, strategically placed privacy screen can be enough to block a key sightline, hide an unsightly view (like your trash cans), or create a more intimate feel for your seating area.
This is a great, manageable DIY project. I often suggest building a simple screen by setting two or three wooden posts in concrete and then running a series of horizontal wooden boards or a simple, decorative lattice panel between them. You can also buy beautiful, pre-made decorative screens made of metal or composite materials.
- Strategic Placement: You don’t need to screen the whole yard, just the key area where you want privacy.
- DIY-Friendly: A simple, fixed screen with horizontal boards is a great beginner woodworking project.
- Plant a Vine: Soften your screen and add more privacy by planting a simple, flowering vine at its base.
For an easy, no-build enhancement, use a series of large, tall, rectangular planters with a tall, slender, evergreen plant (like an arborvitae or a clumping bamboo) to create a beautiful, “living” privacy screen.

11. Paint Your Fence or a Feature Wall
A can of paint is one of the most powerful and affordable tools for a dramatic backyard transformation. A tired, weathered, wooden fence or a boring, concrete block wall can be given a completely new lease on life with a fresh coat of paint. This is a simple project that can have a huge impact on the overall style and mood of your backyard.
For a small yard, painting your boundary fences a dark, moody color—like a deep charcoal gray or a near-black—is a fantastic designer trick. The dark color visually recedes, making the boundaries of your yard seem to disappear and making your green plants pop with incredible vibrancy. Alternatively, a bright, cheerful color on a single, feature wall can create a fun, high-energy focal point.
- Prep is Key: Make sure to thoroughly clean your fence or wall before you start painting.
- Choose Exterior Paint: Use a high-quality, durable paint that is specifically designed for outdoor use.
- Dark for Depth: A dark color can make a small yard feel bigger.
- Bright for a Focal Point: A single, bold, colorful wall can be a great backdrop for a seating area.
For an enhancement, use your newly painted wall as a backdrop for a simple, DIY outdoor art piece. You could hang a collection of painted baskets or a simple, geometric mural that you create with painter’s tape.
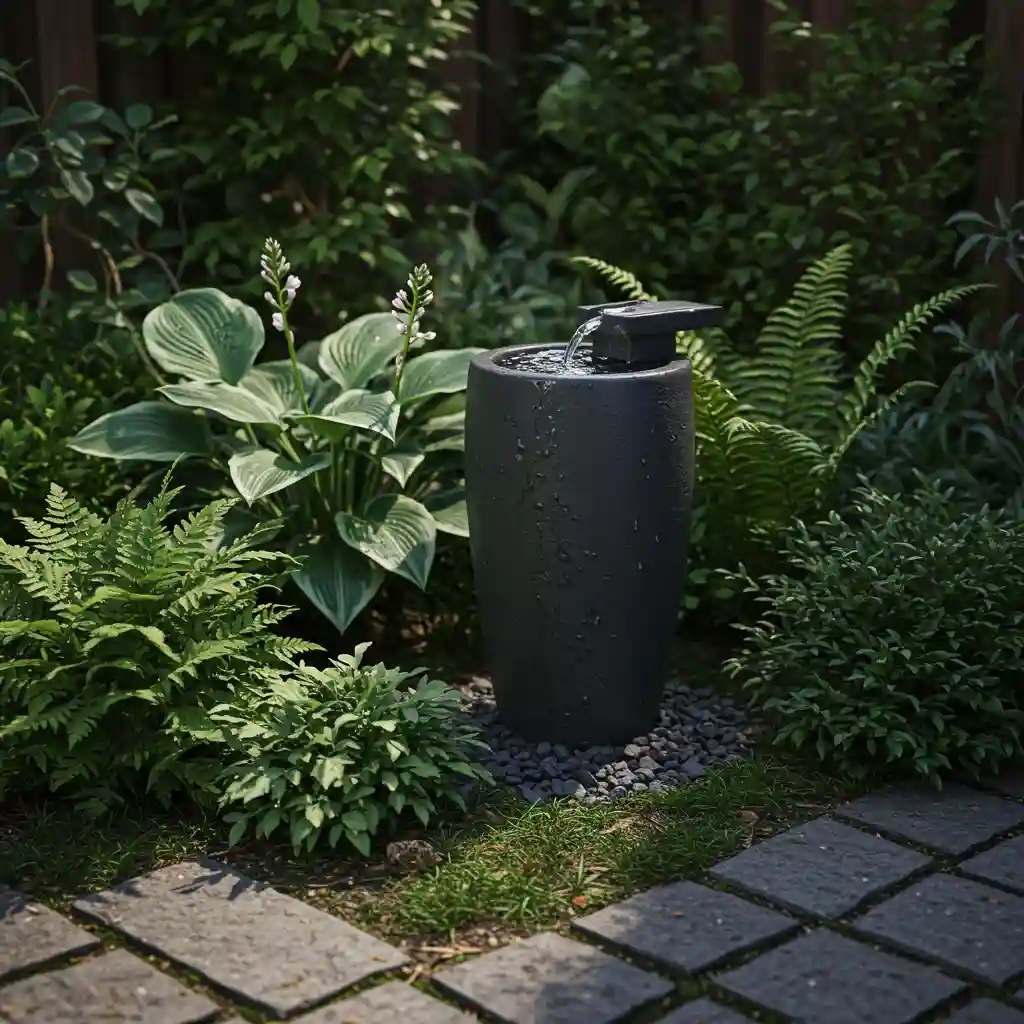
12. Add a Simple Water Feature
The sound of trickling water is one of the most relaxing sounds in nature and can instantly elevate the ambiance of your backyard, making it feel like a tranquil, spa-like retreat. For a beginner, a large, custom water feature is out of the question, but a small, self-contained, “plug-and-play” fountain is a perfect, easy addition. These fountains require no special plumbing; you simply fill them with water, plug them into an outdoor outlet, and they will recirculate the water.
Look for a small, tabletop fountain that you can place on a side table, or a slightly larger, freestanding one that you can tuck into a corner of a garden bed. I always tell my clients that a water feature is fantastic for masking less desirable neighborhood sounds, like traffic, helping to make your backyard feel more like a private, tranquil retreat.
- Self-Contained is Key: Look for a fountain that doesn’t require a dedicated water line.
- Size Matters: Choose a small fountain with a gentle sound that is proportional to your space.
- Maintenance: Top up the water periodically and clean the small pump every now and then to keep it running smoothly.
For a simple enhancement, place a few smooth, dark river stones in the basin of your fountain. This will add a beautiful, natural element and can also help to soften the sound of the splashing water.
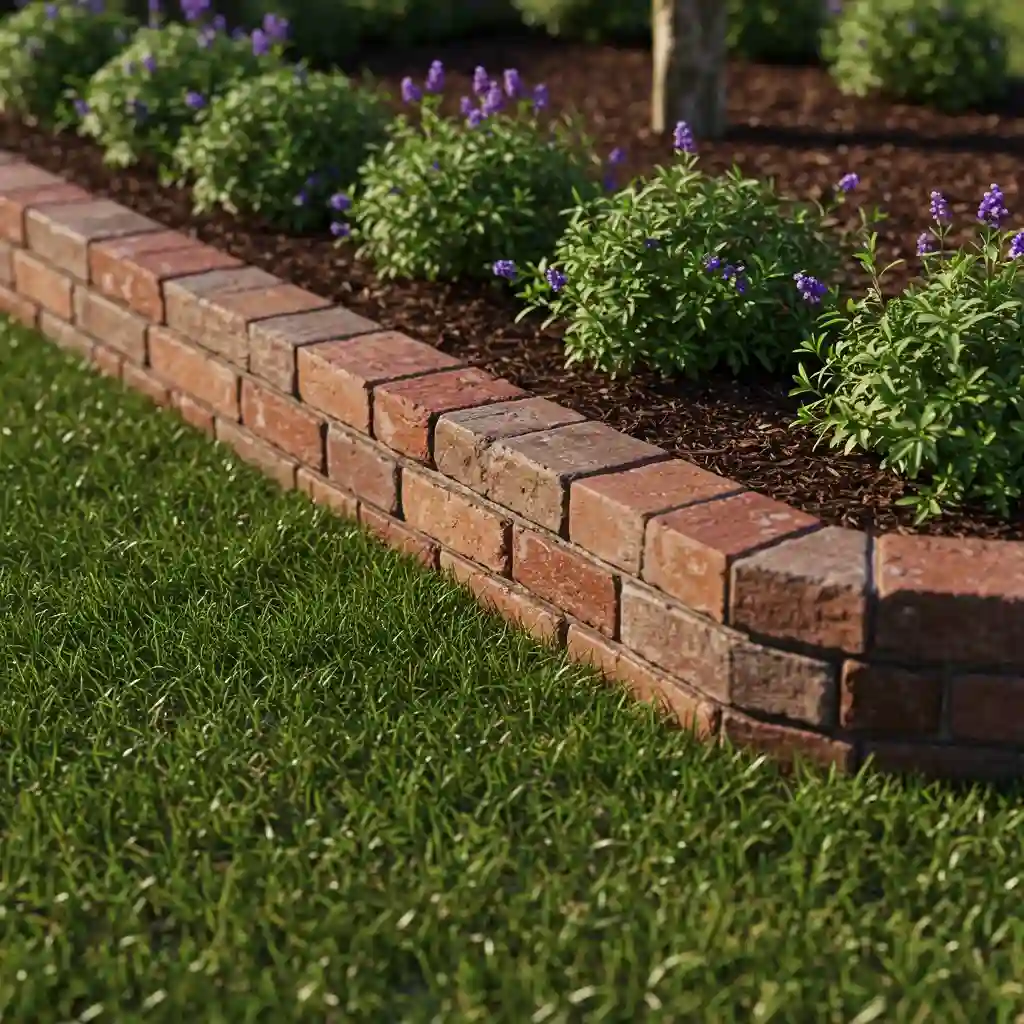
13. Create a Simple Border with Rocks or Bricks
A clean, defined edge is key to a tidy-looking garden, and creating a simple, decorative border for your flower beds is a very easy and inexpensive beginner project. A border adds a touch of rustic charm and a clear, visual separation between your garden and your lawn or patio. It also helps to contain your mulch and soil.
This is a fantastic place to use found or reclaimed materials. I love the look of a simple, rustic border made from a collection of similar-sized rocks or river stones that you can gather yourself. Another classic and very affordable option is to use reclaimed bricks. You can lay them flat, or for a more decorative, “sawtooth” edge, you can set them into the ground at a 45-degree angle.
- Found Rocks: A classic, free, and natural-looking option.
- Reclaimed Bricks: Can often be found for free or very cheaply online.
- Scalloped Concrete Edgers: An inexpensive and very easy-to-install option from a hardware store.
For an enhancement, dig a shallow trench for your border material to sit in. Burying the first inch or two of your rocks or bricks will make the border much more stable, secure, and will also make it easier to mow right up to the edge.
14. Add a Comfortable Bench or Seating for Two
Every backyard, no matter how small, needs a place to sit and enjoy the space you’ve created. Adding a simple, comfortable bench or a small bistro set for two can be the final, perfect touch that turns your yard from something to look at into something to live in. A seating area is an invitation to slow down, relax, and connect with nature.
You don’t need a large, expensive set. A simple, classic wooden garden bench tucked into a shady corner can be a perfect, peaceful retreat. A small, foldable bistro set is a fantastic, flexible option that can be easily stored away if you need the space. I always advise my clients to place their seating in the spot in their yard that has the best view or gets the best light.
- Choose a Spot: Find the most pleasant spot in your yard to create a destination.
- Simple Furniture: A classic garden bench or a small, two-person bistro set.
- Add Comfort: Even a simple outdoor cushion can make a bench much more comfortable.
For an enhancement, create a small “patio” for your seating area. You can do this very simply and cheaply by marking out a small area, laying down a weed barrier, and covering it with a layer of fine gravel or wood chips. This will define the seating area and give it a more stable, finished feel.

15. Plant a Simple Herb Garden
An herb garden is a perfect first gardening project for a beginner. It’s relatively small, incredibly rewarding, and functional. Most herbs are quite easy to grow, and having a supply of fresh, fragrant herbs right outside your door will elevate your cooking. In a simple backyard, you can create a beautiful herb garden in a sunny spot in a garden bed, a small raised bed, or even just in a collection of pots on your patio.
I always suggest beginners start with a few easy, hardy herbs. Many herbs, like rosemary and thyme, are also quite drought-tolerant once they are established, making them very forgiving.
- Easy Herbs for Beginners: Basil, Mint (keep it in a pot, as it can be invasive), Rosemary, Thyme, Parsley, and Chives.
- Sunlight is Key: Most herbs need at least 6 hours of direct sunlight per day, so choose a sunny spot.
- Harvest Often: The more you snip your herbs, the more they will grow.
- Use in Containers: A collection of terracotta pots, each with a different herb, can be a beautiful and functional display.
For a charming and helpful enhancement, create simple, handwritten labels for your herbs. You can write the names on flat stones with a paint pen, on small wooden stakes, or on pieces of broken terracotta pots.

Conclusion
Creating a stunning outdoor space doesn’t have to be a complex or costly endeavor. As we’ve explored through these 15 simple backyard landscaping ideas, the journey to a beautiful backyard begins with a few foundational, high-impact projects. By focusing on creating clean edges, adding a fresh layer of mulch, planting hardy and beautiful plants in thoughtful groups, and incorporating a few simple features like a path or some lighting, any beginner can achieve a professional-looking and deeply enjoyable result. The key is to start small, build your confidence, and not be afraid to get your hands a little dirty.
Frequently Asked Questions (FAQs)
I’m a total beginner. Where do I even start with landscaping my backyard?
The absolute best place to start is with a thorough cleanup and by creating a clean, crisp edge for your existing or new garden beds (Idea #1). This simple, foundational step will instantly make your entire yard look neater and will give you a clear canvas to work with.
What is the easiest way to add color to my backyard?
Planting a few pots with colorful, easy-to-grow annual flowers like petunias or geraniums is the quickest and easiest way to add an instant pop of color. For a more permanent solution, plant a group of long-blooming, hardy perennials like black-eyed susans.
How can I landscape my backyard for cheap?
Focus on DIY projects and inexpensive materials. Creating a pea gravel patio is much cheaper than concrete. Building your own fire pit is cheaper than buying one. Growing plants from seed or getting cuttings from friends is cheaper than buying large plants from a nursery. Mulch is another low-cost, high-impact material.
What is the first thing I should do when planning my backyard design?
After cleaning up, the first thing to do is to decide where you want your main functional area to be.
Where will you sit? Where will you dine?
Deciding on the location of your main patio or seating area will help you to plan the rest of your landscape around it.
How do I keep my simple garden from looking boring?
Create a focal point. A single, beautiful ornamental tree, a charming bench, a small water feature, or a bold group of container plants can provide a central point of interest that draws the eye and anchors the whole design.
What does “edging” a garden bed mean?
Edging is the process of creating a clean, defined line between your lawn and your garden bed. This can be done by simply cutting a shallow trench with a spade (a “spade-cut edge”) or by installing a physical border made of materials like plastic, metal, brick, or stone.
What are the best, most “unkillable” plants for a beginner?
Look for hardy perennials that are known to be tough and drought-tolerant once established. Hostas (for shade), Daylilies, Sedum ‘Autumn Joy’, Catmint, and most ornamental grasses are all famously difficult to kill and provide a lot of beauty for very little effort.